前言
前面说到建了一个base.html页面的模板,接下来会先根据那个基础模板,创建一系列页面。当然,页面内部暂时先不做具体设计。
然后我们接着models.py编写之后,继续来完成一些View的编写。
完成了Model的设计,我们在views.py中做一些视图函数,去调用这些模型提取数据,处理好然后嵌入到模板Template中, 之后我们再分配路由url给到这些视图函数。
步骤
1. 创建一系列待用页面html
我们将会用到至少以下这些模板:
- 首页:index.html
- 我的主页:myblog.html
- 博客列表页:post_list.html
- 博客详情页:post_detail.html
- 草稿箱列表页:post_draft_list.html
- 已发表博客列表页:post_published_list.html
- 添加博客页:post_create_form.html
- 更新博客页:post_update_form.html
- 类别列表页:category_list.html
- 类别详情页:category_detail.html
- 标签列表页:tag_list.html
- 标签详情页:tag_detail.html
- 搜索页:post_search.html
在templates文件夹下创建blog文件夹,把base.html放在blog文件夹下,并在blog中创建上述文件,在每个文件中都写入以下代码:
{% extends "blog/base.html" %}
{% block title %}博客{% endblock %}
{% block body %}<p>test</p>{% endblock %}
这样一来,我们就可以在views视图中暂时调用这些html文件了,后续再逐步更新优化相应的视图、路由和模板,这里先用简单的文件代替。
但是,由于我们在使用博客系统的时候,有些页面只能有用户权限才能访问,也就是我们还要在原 有基础上增加用户登录等操作,于是这里插入一点用户认证的知识,用到的库是django-allauth。
在此之前我们先建立好用户模型,我们将借助Django自带的User类来建立用户模型。
2. 建立用户Model
在models.py中添加以下代码:
from django.db import models
from django.utils import timezone
from django.template.defaultfilters import slugify
from django.urls import reverse
from unidecode import unidecode
from django.contrib.auth.models import User
from allauth.account.models import EmailAddress

class UserProfile(models.Model):
    user = models.OneToOneField(User, on_delete=models.CASCADE, related_name='profile')
    org = models.CharField('组织', max_length=128, blank=True)
    telephone = models.CharField("电话", max_length=50, blank=True)
    last_mod_time = models.DateTimeField('最近更新时间', auto_now=True)

    def __str__(self):
        return "%s的个人信息" % self.user.__str__()

    def account_verified(self):
        if self.user.is_authenticated:
            result = EmailAddress.objects.filter(email=self.user.email)
            if len(result):
                return result[0].verified
        return False

    class Meta:
        verbose_name = '用户个人信息'
        verbose_name_plural = verbose_name
这个类会一对一绑定User类,account_verified()函数用于判断用户邮箱是否已验证。由于User类 只有5个字段如first_name、last_name、email…我们实际上还会有手机啊、公司啊之类的信息, 因此需要对原有User类进行拓展。
同时还要重写用户登录表单。因为django-allauth在用户注册只会创建User对象,不会创建与之关 联的UserProfile对象,而我们需要用户在注册时两个对象必须同时都创建,并存储到数据库中。
3. 添加表单forms.py
我们在blog文件夹下创建一个forms.py文件,用来存放所需的各种表单。 以下是forms.py中的内容:
from django import forms

class ProfileForm(forms.Form):
    first_name = forms.CharField(label='姓氏', max_length=50, required=False)
    last_name = forms.CharField(label='名字', max_length=50, required=False)
    org = forms.CharField(label='组织', max_length=50, required=False)
    telephone = forms.CharField(label='电话', max_length=50, required=False)

class SignupForm(forms.Form):
    def signup(self, request, user):
        user_profile = UserProfile()
        user_profile.user = user
        user.save()
        user_profile.save()
第一个表单是提供用户提交修改信息的表单,第二个表单是新用户注册时,除了Django自动创建User对象外, 我们还要同时创建一个与之相关联的UserProfile对象。
SignupForm表单类将在后面django-allauth库安装完成的时候添加使用, 届时需要在settings.py中增加一个参数来调用这个表单类
完了之后光创建了用户模型类和表单类是没用的,还得有人来帮我们处理用户注册登录和验证的流程,于是 我们用django-admin来做这件事。
4. 添加django-allauth库
在命令行输入以下命令:
pip install django-allauth
安装完成后,找到安装路径(我的是安装在虚拟环境venv中的这里 E:\workspace\python_workspace\venv\Lib\site-packages\allauth\templates\account), 把整个account文件夹复制到myblog/templates/文件夹下。
5. 在settings.py中配置allauth
接着修改settings.py,注册allauth相关app,同时还要设置SITE_ID=1:
INSTALLED_APPS = [
    'django.contrib.admin',
    'django.contrib.auth',
    'django.contrib.contenttypes',
    'django.contrib.sessions',
    'django.contrib.messages',
    'django.contrib.staticfiles',
    'blog',

    # allauth相关app的注册
    'django.contrib.sites',
    'allauth',
    'allauth.account',
    'allauth.socialaccount',
    'allauth.socialaccount.providers.github',   # 用于GitHub第三方平台登录接口
    'allauth.socialaccount.providers.baidu',    # 用于百度第三方平台登录接口
]
SITE_ID = 1
注:我们要注意在之前我们就在settings.py中修改了TEMPLATES的DIRS参数,也就 是templates文件夹的路径。如果没有设置,那么默认allauth会找到安装路径下的account文 件夹中的模板,但是现在我们设置了这个参数,所以前面才会要把account整个文件夹复制过来。
接下来settings.py还有一些邮箱认证的设置:
# allauth设定
ACCOUNT_AUTHENTICATION_METHOD = 'username_email'
ACCOUNT_EMAIL_REQUIRED = True
LOGIN_REDIRECT_URL = '/profile/'    # '/'
ACCOUNT_LOGOUT_REDIRECT_URL = '/accounts/login/'

AUTHENTICATION_BACKENDS = (
    'django.contrib.auth.backends.ModelBackend',
    'allauth.account.auth_backends.AuthenticationBackend',
)

# 设置邮箱
EMAIL_HOST = 'smtp.qq.com'
EMAIL_PORT = 25   # 三个中的一个:25,465,587
EMAIL_HOST_USER = 'xxxx@xxx.com'   # 你的QQ邮箱
EMAIL_HOST_PASSWORD = 'xxxxxxxxxxx'     # 授权码,在邮箱中可以获得(自行百度)
EMAIL_USE_TLS = True    # 这里必须是 True,否则发送不成功
EMAIL_FROM = 'xxxx@xxx.com'    # 你的QQ邮箱
DEFAULT_FROM_EMAIL = 'xxxx@xxx.com'     # 邮件中注明出处用的,随便显示就行

# 设置allauth使用自定义的注册表单
ACCOUNT_SIGNUP_FORM_CLASS = 'blog.forms.SignupForm'
这里的ACCOUNT_SIGNUP_FORM_CLASS参数就是前面第3点我们说到的:SignupForm表单类添加使用 需要在settings.py中增加一个参数来调用这个表单类。
另外,allauth可配置项如下表:
| 参数 | 默认值或可选值 | 说明 |
|---|---|---|
| ACCOUNT_AUTHENTICATION_METHOD | “username” or “email” or “username_email” | 指定要使用的登录方法(用户名、电子邮件地址或两者之一) |
| ACCOUNT_EMAIL_REQUIRED | True | 为True时要求登录时一定要输入邮箱 |
| ACCOUNT_EMAIL_CONFIRMATION_EXPIRE_DAYS | 3 | 邮件确认邮件的截止日期(天数) |
| ACCOUNT_EMAIL_VERIFICATION | “optional” | 注册中邮件验证方法:“强制(mandatory)”,“可选(optional)”或“否(none)”之一 |
| ACCOUNT_EMAIL_CONFIRMATION_COOLDOWN | 180 | 邮件发送后的冷却时间(以秒为单位) |
| ACCOUNT_LOGIN_ATTEMPTS_LIMIT | 5 | 登录尝试失败的次数 |
| ACCOUNT_LOGIN_ATTEMPTS_TIMEOUT | 300 | 从上次失败的登录尝试,用户被禁止尝试登录的持续时间 |
| ACCOUNT_LOGIN_ON_EMAIL_CONFIRMATION | False | 更改为True,用户一旦确认他们的电子邮件地址,就会自动登录 |
| ACCOUNT_LOGOUT_ON_PASSWORD_CHANGE | False | 更改或设置密码后是否自动退出 |
| ACCOUNT_LOGIN_ON_PASSWORD_RESET | False | 更改为True,用户将在重置密码后自动登录 |
| ACCOUNT_SESSION_REMEMBER | None | 控制会话的生命周期,可选项还有:False,True |
| ACCOUNT_SIGNUP_EMAIL_ENTER_TWICE | False | 用户注册时是否需要输入邮箱两遍 |
| ACCOUNT_SIGNUP_PASSWORD_ENTER_TWICE | True | 用户注册时是否需要用户输入两遍密码 |
| ACCOUNT_USERNAME_BLACKLIST | [] | 用户不能使用的用户名列表 |
| ACCOUNT_UNIQUE_EMAIL | True | 加强电子邮件地址的唯一性 |
| ACCOUNT_USERNAME_MIN_LENGTH | 1 | 用户名允许的最小长度的整数 |
| SOCIALACCOUNT_AUTO_SIGNUP | True | 使用从社会帐户提供者检索的字段(如用户名、邮件)来绕过注册表单 |
| LOGIN_REDIRECT_URL | ”/” | 设置登录后跳转链接 |
| ACCOUNT_LOGOUT_REDIRECT_URL | ”/” | 设置退出登录后跳转链接 |
6. 配置路由urls.py
配置完了之后,网站发生了什么呢?我们可以设置一点视图,来显示我们安装配置allauth之后发生的变化。 首先打开myblog/urls.py设置一下路由:
from django.contrib import admin
from django.urls import path, include
from django.conf.urls.static import static
from django.conf import settings

urlpatterns = [
    path('admin/', admin.site.urls),
    path('accounts/', include('allauth.urls')),
    path('', include('blog.urls')),
] + static(settings.MEDIA_URL, document_root=settings.MEDIA_ROOT)
把allauth.urls添加进来,顺便把MEDIA_URL也设置一下,可能以后上传图片什么的会用到。
接着是blog/urls.py,修改如下:
from django.urls import path, re_path
from . import views
app_name = 'blog'
urlpatterns = [
    re_path(r'^profile/$', views.profile, name='profile'),
    re_path(r'^profile/update/$', views.profile_update, name='profile_update'),
]
7. 配置视图views.py
然后打开views.py修改如下:
from django.shortcuts import render, get_object_or_404
from django.http import HttpResponseRedirect
from django.urls import reverse
from .models import UserProfile
from .forms import ProfileForm
from django.contrib.auth.decorators import login_required   # 登录装饰器

# 登录后主页
@login_required
def profile(request):
    user = request.user
    return render(request, 'account/profile.html', {'user': user})

# 登录后更新个人信息页
@login_required
def profile_update(request):
    user = request.user
    user_profile = get_object_or_404(UserProfile, user=user)

    if request.method == 'POST':
        form = ProfileForm(request.POST)
        if form.is_valid():
            user.first_name = form.cleaned_data['first_name']
            user.last_name = form.cleaned_data['last_name']
            user.save()

            user_profile.org = form.cleaned_data['org']
            user_profile.telephone = form.cleaned_data['telephone']
            user_profile.save()

            return HttpResponseRedirect(reverse('blog:profile'))
    else:
        default_data = {'first_name': user.first_name, 'last_name': user.last_name,
                        'org': user_profile.org, 'telephone': user_profile.telephone}
        form = ProfileForm(default_data)

    return render(request, 'account/profile_update.html', {'form': form, 'user': user})
login_required是装饰器,经过装饰之后的视图函数都会去验证是否为用户登录状态,不是的话会跳转到登录页。
8. 修改模板(相关html文件)
8.1 修改account/base.html
接着我们来修改一点html模板内容。首先打开templates/account/base.html
<!DOCTYPE html>
<html lang="zh-CN">
{% load staticfiles %}
<head>
    <meta charset="utf-8">
    <meta http-equiv="X-UA-Compatible" content="IE=edge">
    <meta name="viewport" content="width=device-width, initial-scale=1">
    <title>{% block head_title %}{% endblock %}</title>
    <link rel="stylesheet" href="{% static 'bootstrap/css/bootstrap.min.css' %}">
</head>
<body>
<main>
    <div class="container">
        {% block content %}
        {% endblock %}
    </div>
</main>
<script src="{% static 'bootstrap/js/jquery.min.js' %}"></script>
<script src="{% static 'bootstrap/js/bootstrap.min.js' %}"></script>"

</body>
</html>
8.2 导入美化bootstrap的库——django-widget-tweaks
这里我们为了稍微美化一下,我们还可以引用django-widget-tweaks库,输入以下命令安装:
pip install django-widget-tweaks
安装后在settings.py中设置:
INSTALLED_APPS = [
    'django.contrib.admin',
    'django.contrib.auth',
    'django.contrib.contenttypes',
    'django.contrib.sessions',
    'django.contrib.messages',
    'django.contrib.staticfiles',
    'blog',

    # allauth相关app的注册
    'django.contrib.sites',
    'allauth',
    'allauth.account',
    'allauth.socialaccount',
    'allauth.socialaccount.providers.github',
    'allauth.socialaccount.providers.baidu',

    # bootstrap的css设置相关app的注册
    'widget_tweaks',            # 多了这一行
]
8.3 新建通用bootstrap模板——bs4_forms.html
然后在模板中可以用{% load widget_tweaks %}导入即可使用,我们主要用到render_field标签, 我们在templates/account/snippets/目录下新建一个通用bootstrap显示表单的html文件,命名bs4_forms.html:
{% load widget_tweaks %}

{% for hidden_field in form.hidden_fields %}
    {{ hidden_field }}
{% endfor %}

{% if form.non_field_errors %}
    <div class="alert alert-danger" role="alert">
        {% for error in form.non_field_errors %}
            {{ error }}
        {% endfor %}
    </div>
{% endif %}

{% for field in form.visible_fields %}
    <div class="form-group">
        {{ field.label_tag }}

        {% if form.is_bound %}
            {% if field.errors %}
                {% render_field field class="form-control is-invalid" %}
                {% for error in field.errors %}
                    <div class="invalid-feedback">
                        {{ error }}
                    </div>
                {% endfor %}
            {% else %}
                {% render_field field class="form-control is-valid" %}
            {% endif %}
        {% else %}
            {% render_field field class="form-control" %}
        {% endif %}

        {% if field.help_text %}
            <small class="form-text text-muted">{{ field.help_text}}</small>
        {% endif %}
    </div>
{% endfor %}
8.4 修改signup.html
然后我们修改原来的templates/account/signup.html成如下:
{% extends "account/base.html" %}
{% load i18n %}
{% load widget_tweaks %}
{% block head_title %}{% trans "Signup" %}{% endblock %}
{% block content %}
<h1>{% trans "Sign Up" %}</h1>
<p>{% blocktrans %}Already have an account? Then please <a href="{{ login_url }}">sign in</a>.{% endblocktrans %}</p>
<form class="signup" id="signup_form" method="post" action="{% url 'account_signup' %}">
{% csrf_token %}
{% include 'account/snippets/bs4_form.html' with form=form %}
{% if redirect_field_value %}
<input type="hidden" name="{{ redirect_field_name }}" value="{{ redirect_field_value }}" />
{% endif %}
<div class="form-group">
<button type="submit">{% trans "Sign Up" %} »</button>
</div>
</form>
{% endblock %}
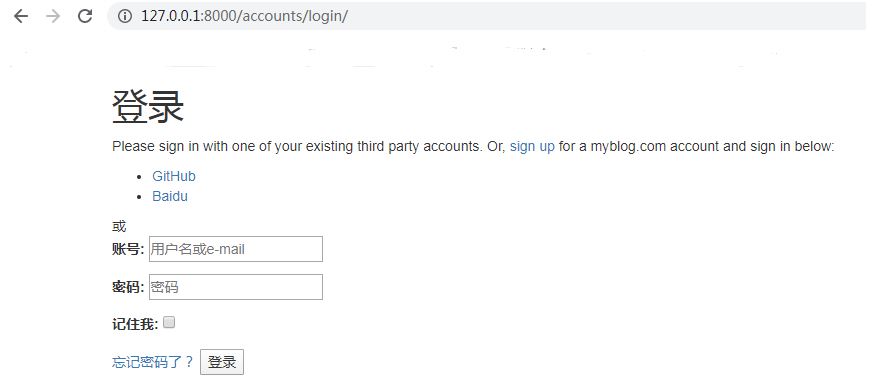
其中csrf_token是django为用户实现防止跨站请求伪造的功能,在中间件django.middleware.csrf.CsrfViewMiddleware中完成。
登录界面如下图:
8.5 新建用户主页和用户信息更新页
我们再在templates/account/目录下新增两个html文件:profile.html和profile_update.html,用来显示登录后界 面和自定义个人信息更新,辅助我们理解allauth用户认证之间的跳转逻辑:
{% extends "account/base.html" %}
{% block content %}
{% if user.is_authenticated %}
<a href="{% url 'blog:profile_update' %}">Update Profile</a> | <a href="{% url 'account_email' %}">Manage Email</a>  | <a href="{% url 'account_change_password' %}">Change Password</a> |
<a href="{% url 'account_logout' %}">Logout</a>
{% endif %}
<p>Welcome, {{ user.username }}.
    {% if not user.profile.account_verified %}
    (Unverified email.)
    {% endif %}
</p>

<h2>My Profile</h2>

<ul>
    <li>First Name: {{ user.first_name }} </li>
    <li>Last Name: {{ user.last_name }} </li>
    <li>Organization: {{ user.profile.org }} </li>
    <li>Telephone: {{ user.profile.telephone }} </li>
</ul>
{% endblock %}
user.is_authenticated用于判断用户是否登录,account_email、account_change_password 和account_logout是allauth自带的路由分发关键词,与urls.py中path()函数中的name参数一致。
if not user.profile.account_verified判断邮箱是否已经验证。
profile_update.html文件如下:
{% extends "account/base.html" %}
{% block content %}
{% if user.is_authenticated %}
<a href="{% url 'blog:profile_update' %}">Update Profile</a> | <a href="{% url 'account_email' %}">Manage Email</a>  | <a href="{% url 'account_change_password' %}">Change Password</a> |
<a href="{% url 'account_logout' %}">Logout</a>
{% endif %}
<h2>Update My Profile</h2>

<div class="form-wrapper">
   <form method="post" action="" enctype="multipart/form-data">
      {% csrf_token %}
      {% for field in form %}
           <div class="fieldWrapper">
        {{ field.errors }}
        {{ field.label_tag }} {{ field }}
        {% if field.help_text %}
             <p class="help">{{ field.help_text|safe }}</p>
        {% endif %}
           </div>
        {% endfor %}
      <div class="button-wrapper submit">
         <input type="submit" value="Update" />
      </div>
   </form>
</div>
{% endblock %}
8.6 可尝试访问测试一下
这么一来会发生什么呢?现在我们运行网站的话,可以访问
- 127.0.0.1:8000/accounts/signup 注册页
- 127.0.0.1:8000/accounts/login 登录页
- 127.0.0.1:8000/accounts/logout 退出登录页
- 127.0.0.1:8000/accounts/password/reset 修改密码页
- … 我们修改一些路由和跳转逻辑,然后修改一定的模板,就可以实现一个简单的用户注册登录和验证的功能了。
比方说在主页放一个注册按钮,点击之后跳转到accounts/signup链接,注册的时候就会用我们上面设置的邮箱, 去发送邮箱验证,当然没有验证成功也没关系,还是可以登录,登录后跳转到/profile/路由,在profile.html中 去验证,或者更新信息、修改邮箱、修改密码等操作,退出登录后回到登录页面等。
django-allauth已经提供了一些基本页面的模板,如登录页、注册页,但是没有提供登录后的显示页, 因此我们在调用接口时要自己写一个html文件,如本篇博客中的profile.html文件,同时 在settings.py中设置好LOGIN_REDIRECT_URL参数,即配置登录重定向。
到这里为止,一般来说allauth是没什么问题的,主要就是添加一些跳转逻辑,优化网页就可以了。 于是profile和profile_update这两个视图后面可能会删掉不用, 同时从现在开始,登录后重定向到首页,也就是修改settings.py中这一行:
LOGIN_REDIRECT_URL = '/' # 把原来的'/profile/'换成'/'
9. 再次修改路由blog/urls.py
在blog/urls.py文件中添加可能用到的url分配给对应的视图:
from django.urls import path, re_path
from . import views

app_name = 'blog'

urlpatterns = [
    re_path(r'^profile/$', views.profile, name='profile'),
    re_path(r'^profile/update/$', views.profile_update, name='profile_update'),

    # - 首页(不需要登录(登录后也是这个页面)):index.html
    path('', views.index, name='index'),
    # - 博客列表页:post_list.html
    path('post/list/', views.PostListView.as_view(), name='post_list'),
    # - 博客详情页(不需要登录(登录后也是这个页面)):post_detail.html
    re_path(r'^post/(?P<pk>\d+)/(?P<slug1>[-\w]+)/$', views.PostDetailView.as_view(), name='post_detail'),
    # 我的主页(需要登录):myblog.html
    path('user/', views.myblogView, name='myblog'),
    # - 草稿箱列表页(需要登录):post_draft_list.html
    path('draft/', views.PostDraftListView.as_view(), name='post_draft_list'),
    # - 已发表博客列表页(需要登录):post_published_list.html
    path('admin/', views.PostPublishedListView.as_view(), name='published_post_list'),
    # - 添加博客页(需要登录):post_create_form.html
    re_path(r'^post/create/$', views.PostCreateView.as_view(), name='post_create'),
    # - 更新博客页(需要登录):post_update_form.html
    re_path(r'^post/(?P<pk>\d+)/(?P<slug>[-\w]+)/update/$', views.post_publish, name='post_publish'),
    # - 类别列表页(需要登录):category_list.html
    re_path(r'^category/$', views.CategoryListView.as_view(), name='category_list'),
    # - 类别详情页(需要登录):category_detail.html
    re_path(r'^category/(?P<slug>[-\w]+)/$', views.CategoryDetailView.as_view(), name='category_detail'),
    # - 标签列表页(需要登录):tag_list.html
    re_path(r'^tags/$', views.TagListView.as_view(), name='tag_list'),
    # - 标签详情页(需要登录):tag_detail.html
    re_path(r'^tags/(?P<slug>[-\w]+)/$', views.TagDetailView.as_view(), name='tag_detail'),
    # - 搜索页(不需要登录):post_search.html
    re_path(r'^search/$', views.post_search, name='post_search'),
]
可以看到,一般我们使用path函数即可,re_path函数则可以使用正则规则匹配传入进来的url链接中的参数,用“(?P<参数名>正则规则)”来匹配,
path或者re_path传入的第二个参数是视图函数,如果是通用视图(如DetailView等),则需要调用as_view()方法,否则给函数名就行。
10. 再次修改views.py
前面我们说到了django-allauth,其实就是提供了用户登录注册和验证的操作。现在我们完成了用户注册登录验证这些 之后,可以在views.py中创建一些视图函数来处理博客系统的页面需求了。还是先写点简单就好,后面再更新优化。
发现没有,我们的思路基本就是:模型,路由,视图,表单,模板,模型,路由。。。一直循环。
ok,那么views.py改成啥样呢:
from django.shortcuts import render, get_object_or_404, redirect
from django.http import HttpResponseRedirect, Http404
from django.urls import reverse, reverse_lazy

from .models import UserProfile, Post, Tag, Category
from .forms import ProfileForm, PostForm

from django.contrib.auth.decorators import login_required   # 登录装饰器
from django.utils.decorators import method_decorator    # 函数装饰器转方法装饰器

from django.views.generic import DetailView, ListView
from django.views.generic.edit import CreateView, UpdateView, DeleteView

from django.core.paginator import Paginator, EmptyPage, PageNotAnInteger    # 分页


# 登录后主页
@login_required
def profile(request):
    user = request.user
    return render(request, 'account/profile.html', {'user': user})


# 登录后更新个人信息页
@login_required
def profile_update(request):
    user = request.user
    user_profile = get_object_or_404(UserProfile, user=user)

    if request.method == 'POST':
        form = ProfileForm(request.POST)
        if form.is_valid():
            user.first_name = form.cleaned_data['first_name']
            user.last_name = form.cleaned_data['last_name']
            user.save()

            user_profile.org = form.cleaned_data['org']
            user_profile.telephone = form.cleaned_data['telephone']
            user_profile.save()

            return HttpResponseRedirect(reverse('blog:profile'))
    else:
        default_data = {'first_name': user.first_name, 'last_name': user.last_name,
                        'org': user_profile.org, 'telephone': user_profile.telephone}
        form = ProfileForm(default_data)

    return render(request, 'account/profile_update.html', {'form': form, 'user': user})


# 首页(不需要登录(登录后也是这个页面)):index.html
def index(request):
    user = request.user

    posts = Post.objects.all()
    paginator = Paginator(posts, 3, 2)
    page = request.GET.get('page')
    try:
        posts = paginator.page(page)
    except PageNotAnInteger:
        posts = paginator.page(1)
    except EmptyPage:
        posts = paginator.page(paginator.num_pages)
    return render(request, "blog/index.html", {'user': user, 'posts': posts})


# 博客列表页:post_list.html
class PostListView(ListView):
    paginate_by = 10  # 每多少条博客分一页
    template_name = 'blog/post_list.html'

    def get_queryset(self):
        return Post.objects.all().order_by('-published_time')


# 博客详情页(不需要登录(登录后也是这个页面)):post_detail.html
class PostDetailView(DetailView):
    model = Post
    template_name = 'blog/post_detail.html'

    def get_object(self, queryset=None):
        obj = super().get_object(queryset=queryset)
        obj.viewed()
        return obj

# 我的主页(需要登录):myblog.html
@login_required()
def myblogView(request):
    post = Post.objects.filter(author=request.user)
    return render(request, 'blog/myblog.html', {'post': post})

# 草稿箱列表页(需要登录):post_draft_list.html
@method_decorator(login_required, name='dispatch')
class PostDraftListView(ListView):
    template_name = 'blog/post_draft_list.html'
    paginate_by = 10

    def get_queryset(self):
        return Post.objects.filter(author=self.request.user).filter(status='draft').order_by('-published_time')


# 已发表博客列表页(需要登录):post_published_list.html
@method_decorator(login_required, name='dispatch')
class PostPublishedListView(ListView):
    template_name = 'blog/post_published_list.html'
    paginate_by = 10

    def get_queryset(self):
        return Post.objects.filter(status='published').order_by('-published_time')

# 添加博客页(需要登录):post_create_form.html
@method_decorator(login_required, name='dispatch')
class PostCreateView(CreateView):
    template_name = 'blog/post_create_form.html'
    model = Post
    form_class = PostForm

    def form_valid(self, form):
        form.instance.author = self.request.user
        return super().form_valid(form)

# 更新博客页(需要登录):post_update_form.html
@method_decorator(login_required, name='dispatch')
class PostUpdateView(UpdateView):
    model = Post
    form_class = PostForm
    template_name = 'blog/post_update_form.html'

    def get_object(self, queryset=None):
        obj = super().get_object(queryset=queryset)
        if obj.author != self.request.user:
            raise Http404()

# 类别列表页(需要登录):category_list.html
@method_decorator(login_required, name='dispatch')
class CategoryListView(ListView):
    template_name = 'blog/category_list.html'
    model = Category

# 类别详情页(需要登录):category_detail.html
@method_decorator(login_required, name='dispatch')
class CategoryDetailView(DetailView):
    template_name = 'blog/category_detail.html'
    model = Category

# 标签列表页(需要登录):tag_list.html
@method_decorator(login_required, name='dispatch')
class TagListView(ListView):
    template_name = 'blog/tag_list.html'
    model = Tag

# 标签详情页(需要登录):tag_detail.html
@method_decorator(login_required, name='dispatch')
class TagDetailView(DetailView):
    template_name = 'blog/tag_detail.html'
    model = Tag

# 搜索页(不需要登录):post_search.html
@login_required()
def post_search(request):
    return render(request, 'blog/post_search.html')

# 保存的草稿发布出去:
@login_required()
def post_publish(request, pk, slug):
    post = get_object_or_404(Post, pk=pk, author=request.user)
    post.published()
    return redirect(reverse("blog:post_detail", args=[str(pk), slug]))
在原来的基础上增加了上面这些函数和视图类,其中视图类是继承自一些通用视图类,有DetailView, ListView, CreateView, UpdateView, DeleteView。
前面我们说到了如果是函数,如def profile(request),那么只需要在函数定义前 加@login_required()装饰器,但如果是类,我们则需要用@method_decorator(login_required, name=’dispatch’) 来将login_required函数装饰器转化为方法装饰器。
reverse()中第一个参数为软编码路由,args为参数,这个函数用于将软编码路由转化成url链接, 然后丢给相应的视图函数处理。这里实现的功能就是在当前视图函数跳转到另一个视图函数,可以理 解为跳转到目标网页。
这其中还要注意通用视图类的参数,如template_name、model、form_class、paginate_by, 还有一些内置方法,如get_object(self, queryset=None)、get_queryset(self)、form_valid(self, form)等。 这些后面详细修改页面内容的时候再来说。
11. 再次修改forms.py
上面views.py中提到了一个PostForm是新建博客用的表单: 在forms.py中新增表单类:
from django import forms
from .models import UserProfile, Post

class PostForm(forms.ModelForm):
    class Meta:
        model = Post
        exclude = ['author', 'views', 'slug', 'published_time']
        widgets = {
            'title': forms.TextInput(attrs={'class': 'form-control'}),
            'body': forms.Textarea(attrs={'class': 'form-control'}),
            'status': forms.Select(attrs={'class': 'form-control'}),
            'category': forms.Select(attrs={'class': 'form-control'}),
            'tags': forms.CheckboxSelectMultiple(attrs={'class': 'multi-checkbox'}),
        }
- TextInput是单行输入
- Textarea是输入区
- Select是下拉选项,所以需要提前在后台或数据库中添加category可选项
- CheckboxSelectMultiple是多个勾选项,也需要提前预设(有点蛋疼,后面得想办法优化)
到目前为止,只能在数据库或后台手动添加,后台手动添加的话得先在blog/admin.py中注册:
from django.contrib import admin
from .models import Post, Category, Tag

# Register your models here.
admin.site.register(Post)
admin.site.register(Category)
admin.site.register(Tag)
访问后台127.0.0.1:8000/admin就可以直接增删查改了,不赘述。
12. 修改templates/blog/base.html
配置完成我们可以借鉴bootstrap提供的blog.html和blog.css博客模板来搭建我们的首页,当然 我还没有改好,仅做了一点调整,模板上的很多链接啊按钮啊都没用上。
把 bootstrap-3.3.7/docs/examples/blog/blog.css 这个文件复制到static/css/目录下。
接着我们先修改templates/blog/base.html如下:
<!DOCTYPE html>
<html lang="zh-CN">
{% load staticfiles %}
{% load widget_tweaks %}
  <head>
    <meta charset="utf-8">
    <meta http-equiv="X-UA-Compatible" content="IE=edge">
    <meta name="viewport" content="width=device-width, initial-scale=1">
    <!-- The above 3 meta tags *must* come first in the head; any other head content must come *after* these tags -->
    <meta name="description" content="">
    <meta name="author" content="">
    <link rel="icon" href="{% static 'img/favicon.ico' %}">

    <title>{% block title %}{% endblock %}</title>

    <!-- Bootstrap core CSS -->
    <link href="{% static 'bootstrap/css/bootstrap.min.css' %}" rel="stylesheet">

    <!-- IE10 viewport hack for Surface/desktop Windows 8 bug -->
    <link href="{% static 'bootstrap/css/ie10-viewport-bug-workaround.css' %}" rel="stylesheet">

    <!-- Custom styles for this template -->
    <link href="{% static 'css/blog.css' %}" rel="stylesheet">

    <!-- Just for debugging purposes. Don't actually copy these 2 lines! -->
    <!--[if lt IE 9]><script src="{% static 'bootstrap/js/ie8-responsive-file-warning.js' %}"></script><![endif]-->   <!--这两行修改跟上面一样修改一下路径-->
    <script src="{% static 'bootstrap/js/ie-emulation-modes-warning.js' %}"></script>

    <!-- HTML5 shim and Respond.js for IE8 support of HTML5 elements and media queries -->
    <!--[if lt IE 9]>
      <script src="https://oss.maxcdn.com/html5shiv/3.7.3/html5shiv.min.js"></script>
      <script src="https://oss.maxcdn.com/respond/1.4.2/respond.min.js"></script>
    <![endif]-->
  </head>

  <body>
    <div class="blog-masthead">
      <div class="container">
        <nav class="blog-nav">
          {% block head %}{% endblock %}
        </nav>
      </div>
    </div>

    {% block body%}{% endblock %}

    <footer class="blog-footer">
      {% block footer %}{% endblock %}
    </footer>

    <!-- Bootstrap core JavaScript
    ================================================== -->
    <!-- Placed at the end of the document so the pages load faster -->
    <script src="{% static 'bootstrap/js/jquery.min.js' %}"></script>
    <script src="{% static 'bootstrap/js/bootstrap.min.js' %}"></script>

    <!-- IE10 viewport hack for Surface/desktop Windows 8 bug -->
    <script src="{% static 'bootstrap/js/ie10-viewport-bug-workaround.js' %}"></script>
  </body>
</html>
其中有一些注释是IE浏览器兼容的,其他都是Django模板风格的代码。
13. 首页index.html
首页没有把blog.html的内容全保留,删了绝大部分后如下:
{% extends "blog/base.html" %}
{% block title %}博客{% endblock %}
{% block body %}
    <div class="blog-masthead">
      <div class="container">
        <nav class="blog-nav">
          <a class="blog-nav-item active" href="{% url 'blog:index' %}">首页</a>
          {% if user.is_authenticated %}
          <a class="blog-nav-item" href="{% url 'blog:myblog' %}">我的主页</a>
          <a class="blog-nav-item" href="/accounts/logout/">退出</a>
          {% else %}
          <a class="blog-nav-item" href="/accounts/signup/">注册</a>
          <a class="blog-nav-item" href="/accounts/login/">登录</a>
          {% endif %}
          <form class="navbar-search pull-right" action="{% url 'blog:post_search'%}">
            <input type="text" class="search-query" placeholder="search">
            <button type="submit" class="btn btn-default">搜索</button>
          </form>
        </nav>
      </div>
    </div>

    <div class="container">
        <ul>
          {% for post in posts %}
          <li>{{ post }}</li>
          {% endfor %}
        </ul>
    </div>
{% endblock %}

{% block footer %}
{% endblock %}
这段代码主要只是实现了当用户没有登录时会有登录和注册按键,当用户登录后,只有退出和我的主页按键。 当然首页按键是一直有的。还提供了的博客文章的显示,但是还很简陋。
14. 我的主页myblog.html
直接贴代码了,不过还没改好,只实现了一点跳转的逻辑,也没有美化。
{% extends "blog/base.html" %}
{% block title %}博客{% endblock %}
{% block body %}
    <div class="blog-masthead">
      <div class="container">
        <nav class="blog-nav">
          <a class="blog-nav-item" href="{% url 'blog:index' %}">首页</a>
          {% if user.is_authenticated %}
          <a class="blog-nav-item active" href="{% url 'blog:myblog' %}">我的主页</a>
          <a class="blog-nav-item" href="/accounts/logout/">退出</a>
          {% else %}
          <a class="blog-nav-item" href="/accounts/signup/">注册</a>
          <a class="blog-nav-item" href="/accounts/login/">登录</a>
          {% endif %}
          <form class="navbar-search pull-right" action="{% url 'blog:post_search'%}">
            <input type="text" class="search-query" placeholder="search">
            <button type="submit" class="btn btn-default">搜索</button>
          </form>
        </nav>
      </div>
    </div>

    <div class="container">
      <a class="button" href="{% url 'blog:post_create' %}">新增博客</a>
      <a class="button" href="{% url 'blog:profile_update' %}">修改个人信息</a>

      {% if page_obj %}
      <table class="table table-striped">
          <thead>
              <tr>
                  <th>标题</th>
                  <th>类别</th>
                  <th>发布日期</th>
                  <th>查看</th>
                  <th>修改</th>
                  <th>删除</th>
              </tr>
          </thead>
          <tbody>
           {% for post in page_obj %}
              <tr>
                  <td>
                  {{ post.title }}
                  </td>
                  <td>
                  {{ post.category.name }}
                  </td>
                  <td>
                  {{ post.published_time | date:"Y-m-d" }}
                  </td>
                   <td>
                       <a href="{% url 'blog:post_detail' post.id post.slug %}"><span class="glyphicon glyphicon-eye-open"></span></a>
                  </td>

                   <td>
                      <a href="{% url 'blog:post_update' post.id post.slug %}"><span class="glyphicon glyphicon-wrench"></span></a>
                  </td>

                   <td>
                      <a href="{% url 'blog:post_delete' post.id post.slug %}"><span class="glyphicon glyphicon-trash"></span></a>
                  </td>
           {% endfor %}
              </tr>
          </tbody>
      </table>

      {% else %}
      {# 注释: 这里可以换成自己的对象 #}
          <p>没有文章。</p>
      {% endif %}

<!--      分页-->
          <nav>
            <ul class="pager">
              <li><a href="#">Previous</a></li>
              <li><a href="#">Next</a></li>
            </ul>
          </nav>
    </div><!-- /.container -->
{% endblock %}

{% block footer %}

{% endblock %}
其实跟首页内容类似,不过多的这个分页功能还没有测试,首页后面也要添加这个分页功能。
15. 新建博客页post_create_form.html
用bootstrap简单美化的新建博客页提交表单,代码如下:
{% extends "blog/base.html" %}
{% block title %}博客{% endblock %}
{% block body %}

<h3>添加新文章</h3>

<form method="POST" class="form-horizontal" role="form" action="" >
  {% csrf_token %}
  {% for hidden_field in form.hidden_fields %}
    {{ hidden_field }}
  {% endfor %}
  {% if form.non_field_errors %}
    <div class="alert alert-danger col-md-12" role="alert">
      {% for error in form.non_field_errors %}
        {{ error }}
      {% endfor %}
    </div>
  {% endif %}

  {% for field in form.visible_fields %}
  <div class="form-group col-md-12">
        {{ field.label_tag }}
        {{ field }}
        {% if field.errors %}
          {% for error in field.errors %}
            <div class="invalid-feedback">
              {{ error }}
            </div>
          {% endfor %}
        {% endif %}
      {% if field.help_text %}
        <small class="form-text text-muted">{{ field.help_text }}</small>
      {% endif %}
    </div>
  {% endfor %}
  <div class="form-group">
     <div class="col-md-12">
    <input type="submit" class="btn btn-primary form-control" value="提交">
     </div>
  </div>
</form>
{% endblock %}
其中涉及到一点表单类的东西,比如form.visible_fields,field.label_tag等,后面再进一步研究。 这里先直接使用。
到目前为止,稍微动过刀的就有base.html、index.html、myblog.html、post_create_form.html。 没有动过刀的还有很多,包括templates/account/文件夹下的模板,还有一些static/下的css、js文件。
补充:Django模板风格
- 静态文件链接:{% static ‘链接’ %}
- 软编码路由:{% url ‘链接’ %},这里的’链接’由’app_name:url_name’组成如:’blog:index’
- 变量:{{ 变量|选择器 }}
- 注释:{# 注释内容 #}
- for循环:{% for a in a_list %}html代码{% endfor %}
- if条件:{% if a.value==’a’ %}html代码{% elseif a.value==’b’ %}html代码{% else %}html代码{% endif %}
- 块:{% block block_name %}html代码{% endblock %}
- 加载库或文件夹:{% load widget_tweaks %},{% load staticfiles%}…
- 继承模板:{% extends “blog/base.html” %},…
- …
后记
这可能是我写的最长的一篇博客了,其实内容很乱,主要是记录过去一周我对博客系统这个项目 的进度,对学习内容的一点思考以及一些学习记录。
到目前为止,稍微动过刀的就有base.html、index.html、myblog.html、post_create_form.html。 没有动过刀的还有很多,包括templates/account/文件夹下的模板,还有一些static/下的css、js文件。
整体实现了用户注册登录验证,简单的views.py视图逻辑,首页主页登录页注册页的一些跳转, 仅提供了按键。很多东西还没有显示出来,还有很多没有考虑到正在构思中的东西,比如点赞、 评论功能、搜索功能、时间分类、推荐算法等。url跳转也比较混乱,没有规划好,在过去一周 中重新构思了很多,原本只是想做一个简单的个人博客,现在引入了用户注册之后想上升为博客 系统或者博客平台。
另外,目前bootstrap不熟,Django很多类的内置方法没有系统地整理出来,我打算接下来把模 型、视图、模板的一些类方法整理一下。
还有慢慢接触一点设计模式,数据库,缓存,消息队列,服务器,序列化,前后端解耦的后 端(Django-Rest-Framework框架)。
参考: