前言
本篇主要是插入一个笔记,记录一下django如何应用bootstrap的一些样式,并学习一下如何做一些简 单的修改,提炼一个基础页面,让我们的页面变得稍微好看一点,后续在Template介绍中再进行更多修改。
步骤
1. 创建templates、static和media文件夹
在myblog工程目录下创建三个文件夹,templates、static和media。
然后再在static中创建三个文件夹,css、img、js和bootstrap。
创建后工程目录如下:
myblog
│  manage.py
│
├─blog
│  │  admin.py
│  │  apps.py
│  │  models.py
│  │  tests.py
│  │  urls.py
│  │  views.py
│  │  __init__.py
│  │
│  └─migrations
│          __init__.py
│
├─media
├─myblog
│     settings.py
│     urls.py
│     wsgi.py
│     __init__.py
│
├─static
│  ├─bootstrap
│  ├─css
│  ├─img
│  └─js
└─templates
2. 在settings.py中导入路径
在myblog/settings.py中,修改以下两处地方:
TEMPLATES = [
    {
        'BACKEND': 'django.template.backends.django.DjangoTemplates',
        'DIRS': [                                   # 主要修改这个变量,在原来空的'DIRS'列表中添加templates路径
            os.path.join(BASE_DIR, 'templates')
        ],
        'APP_DIRS': True,
        'OPTIONS': {
            'context_processors': [
                'django.template.context_processors.debug',
                'django.template.context_processors.request',
                'django.contrib.auth.context_processors.auth',
                'django.contrib.messages.context_processors.messages',
            ],
        },
    },
]

STATIC_URL = '/static/'

STATICFILES_DIRS = [        # 在文件末尾处新建STATICFILES_DIRS列表,添加static路径
    os.path.join(BASE_DIR, 'static')
]

MEDIA_ROOT = os.path.join(BASE_DIR, 'media')    # 再添加media文件夹的路径
MEDIA_URL = '/media/'
这样一来我们使用的前端的HTML文件就可以放在templates中,CSS、JS文件以及网页显示的一些图片 也可以放在static中,网站上传的文件可以放在media中。
3. 下载bootstrap包
在https://v3.bootcss.com/getting-started/#download 这个链接中点击下载源码,然后解压到其他目录(我们暂且叫这个目录为bootstrap-3.3.7/)下。
4. 复制一系列文件
接下来复制一些文件到我们的博客工程目录下,把下表中的原有目录下的对应文件复制到对应的目标目录下:
| 文件名 | 原有目录 | 复制到目标路径 |
|---|---|---|
| favicon.ico | bootstrap-3.3.7/docs/ | myblog/static/img/ |
| 三个文件夹及其所有内容css,js,fonts | bootstrap-3.3.7/docs/dist/ | myblog/static/bootstrap/ |
| ie10-viewport-bug-workaround.css | bootstrap-3.3.7/docs/assets/css/ | myblog/static/bootstrap/css/ |
| blog.css | bootstrap-3.3.7/docs/examples/blog/ | myblog/static/css/ |
| ie8-responsive-file-warning.js ie-emulation-modes-warning.js ie10-viewport-bug-workaround.js |
bootstrap-3.3.7/docs/assets/js/ | myblog/static/bootstrap/js/ |
| jquery.min.js | bootstrap-3.3.7/docs/assets/js/vendor/ | myblog/static/bootstrap/js/ |
在bootstrap-3.3.7/docs/examples/目录下有很多网页模板,可以根据需求拿去修改,这里先用blog模板,上面大家也看到我们把/bootstrap-3.3.7/docs/examples/blog下的两个文件复制到我们的项目中了。
其次,bootstrap是基于jQuery实现的,因此也要导入jQuery库。
5. 修改base.html
这里我是打算把我们应用的blog模板index.html改装成通用的base.html,作为后续页面的主要框架,所以我把templates/index.html改名为templates/base.html。 然后我们先简单修改一下base.html,打开base.html,修改其中的这些项:
<!--    <link rel="icon" href="../../favicon.ico">  -->   <!--把这一行改成下面这一行-->
    <link rel="icon" href="/static/img/favicon.ico">
    <!-- Bootstrap core CSS -->
<!--    <link href="../../dist/css/bootstrap.min.css" rel="stylesheet">-->  <!--把这一行改成下面这一行-->
    <link href="/static/bootstrap/css/bootstrap.min.css" rel="stylesheet">

    <!-- IE10 viewport hack for Surface/desktop Windows 8 bug -->
<!--    <link href="../../assets/css/ie10-viewport-bug-workaround.css" rel="stylesheet">-->   <!--把这一行改成下面这一行-->
    <link href="/static/bootstrap/css/ie10-viewport-bug-workaround.css" rel="stylesheet">

    <!-- Custom styles for this template -->
<!--    <link href="blog.css" rel="stylesheet">-->    <!--把这一行改成下面这一行-->
    <link href="/static/css/blog.css" rel="stylesheet">
    <!-- Just for debugging purposes. Don't actually copy these 2 lines! -->
    <!--[if lt IE 9]><script src="../../assets/js/ie8-responsive-file-warning.js"></script><![endif]-->
    <script src="../../assets/js/ie-emulation-modes-warning.js"></script>
这三行中后两行修改如下,都是修改里面的链接:
    <!-- Just for debugging purposes. Don't actually copy these 2 lines! -->
    <!--[if lt IE 9]><script src="/static/bootstrap/js/ie8-responsive-file-warning.js"></script><![endif]-->
    <script src="/static/bootstrap/js/ie-emulation-modes-warning.js"></script>
还有base.html末尾也要修改:
<!--    <script>window.jQuery || document.write('<script src="../../assets/js/vendor/jquery.min.js"><\/script>')</script>-->  <!--把这一行改成下面这一行-->
    <script>window.jQuery || document.write('<script src="/static/bootstrap/js/jquery.min.js"><\/script>')</script>
<!--    <script src="../../dist/js/bootstrap.min.js"></script>-->   <!--把这一行改成下面这一行-->
    <script src="/static/bootstrap/js/bootstrap.min.js"></script>-->

    <!-- IE10 viewport hack for Surface/desktop Windows 8 bug -->
<!--    <script src="../../assets/js/ie10-viewport-bug-workaround.js"></script>-->  <!--把这一行改成下面这一行-->
    <script src="/static/bootstrap/js/ie10-viewport-bug-workaround.js"></script>
6. 配置试运行
完成上述这些操作之后,我们可以先小小地设置一下,看能不能跑起来。
myblog/blog/views.py中修改如下:
from django.shortcuts import render

def index(request):
    return render(request, "base.html")
接着在命令行中运行:
python manage.py runserver
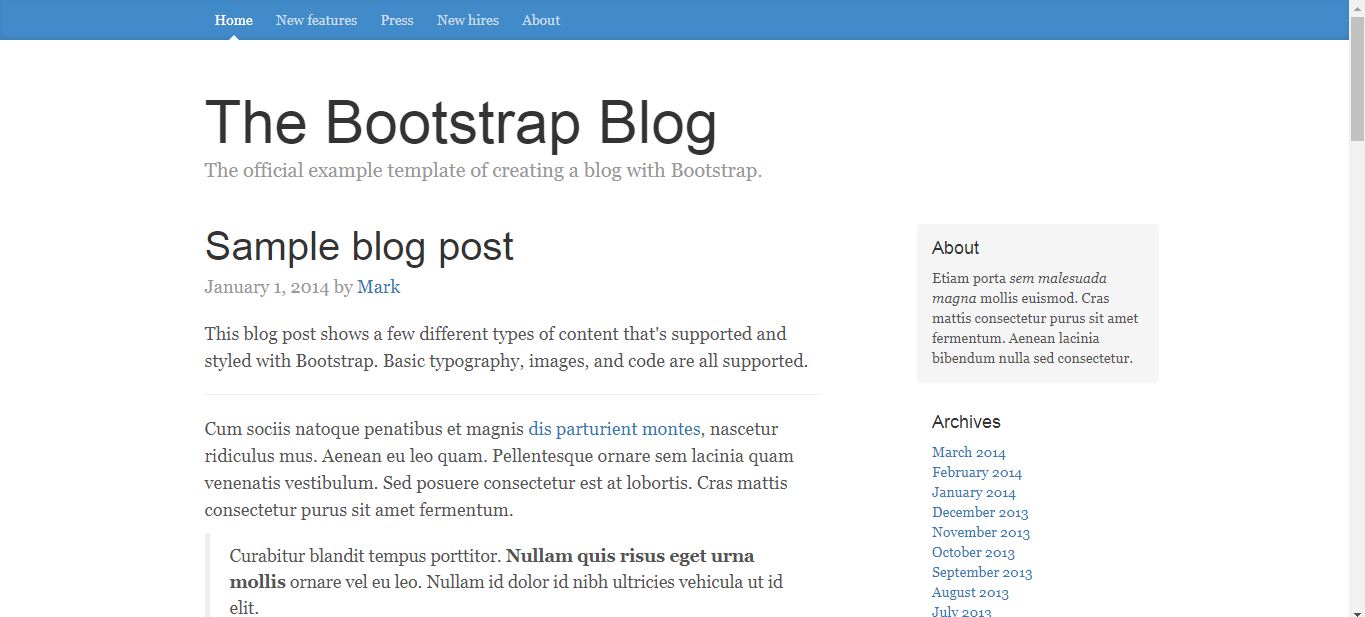
浏览器中输入127.0.0.1:8000就可以看到我们的base.html页面啦。
7. 提炼成基础模板
最后我把base.html精简成如下,主要是修改成Django风格的模板,开头导入了staticfiles,后面有关static的链接都得跟着变。 还把浏览页显示的标题、页面最上面的头、主体和页脚都提炼出来了,后续可能会更改优化成更完善的基本模板,但那也是Template的事了, 修改后base.html如下:
<!DOCTYPE html>
<html lang="zh-CN">
{% load staticfiles %}
  <head>
    <meta charset="utf-8">
    <meta http-equiv="X-UA-Compatible" content="IE=edge">
    <meta name="viewport" content="width=device-width, initial-scale=1">
    <!-- The above 3 meta tags *must* come first in the head; any other head content must come *after* these tags -->
    <meta name="description" content="">
    <meta name="author" content="">
    <link rel="icon" href="{% static 'img/favicon.ico' %}">

    <title>{% block title %}{% endblock %}</title>

    <!-- Bootstrap core CSS -->
    <link href="{% static 'bootstrap/css/bootstrap.min.css' %}" rel="stylesheet">

    <!-- IE10 viewport hack for Surface/desktop Windows 8 bug -->
    <link href="{% static 'bootstrap/css/ie10-viewport-bug-workaround.css' %}" rel="stylesheet">

    <!-- Custom styles for this template -->
    <link href="{% static 'css/blog.css' %}" rel="stylesheet">

    <!-- Just for debugging purposes. Don't actually copy these 2 lines! -->
    <!--[if lt IE 9]><script src="{% static 'bootstrap/js/ie8-responsive-file-warning.js' %}"></script><![endif]-->   <!--这两行修改跟上面一样修改一下路径-->
    <script src="{% static 'bootstrap/js/ie-emulation-modes-warning.js' %}"></script>

    <!-- HTML5 shim and Respond.js for IE8 support of HTML5 elements and media queries -->
    <!--[if lt IE 9]>
      <script src="https://oss.maxcdn.com/html5shiv/3.7.3/html5shiv.min.js"></script>
      <script src="https://oss.maxcdn.com/respond/1.4.2/respond.min.js"></script>
    <![endif]-->
  </head>

  <body>
    <div class="blog-masthead">
      <div class="container">
        <nav class="blog-nav">
          {% block head %}{% endblock %}
        </nav>
      </div>
    </div>

    {% block body%}{% endblock %}

    <footer class="blog-footer">
      {% block footer %}{% endblock %}
    </footer>

    <!-- Bootstrap core JavaScript
    ================================================== -->
    <!-- Placed at the end of the document so the pages load faster -->
    <script src="{% static 'bootstrap/js/jquery.min.js' %}"></script>
    <script src="{% static 'bootstrap/js/bootstrap.min.js' %}"></script>

    <!-- IE10 viewport hack for Surface/desktop Windows 8 bug -->
    <script src="{% static 'bootstrap/js/ie10-viewport-bug-workaround.js' %}"></script>
  </body>
</html>
后记
接下来继续博客项目的views.py部分。